So, you’ve got yourself a pin cask and you’re ready to serve your beer the traditional way. Here’s a step-by-step guide to get it prepped and ready to pour.
What You’ll Need
- A pin cask of beer (usually 4.5 gallons)
- Wooden or plastic shive (for the top opening)
- Wooden or plastic keystone (for the front hole)
- Spile (hard and soft)
- Mallet or rubber hammer
- Tap
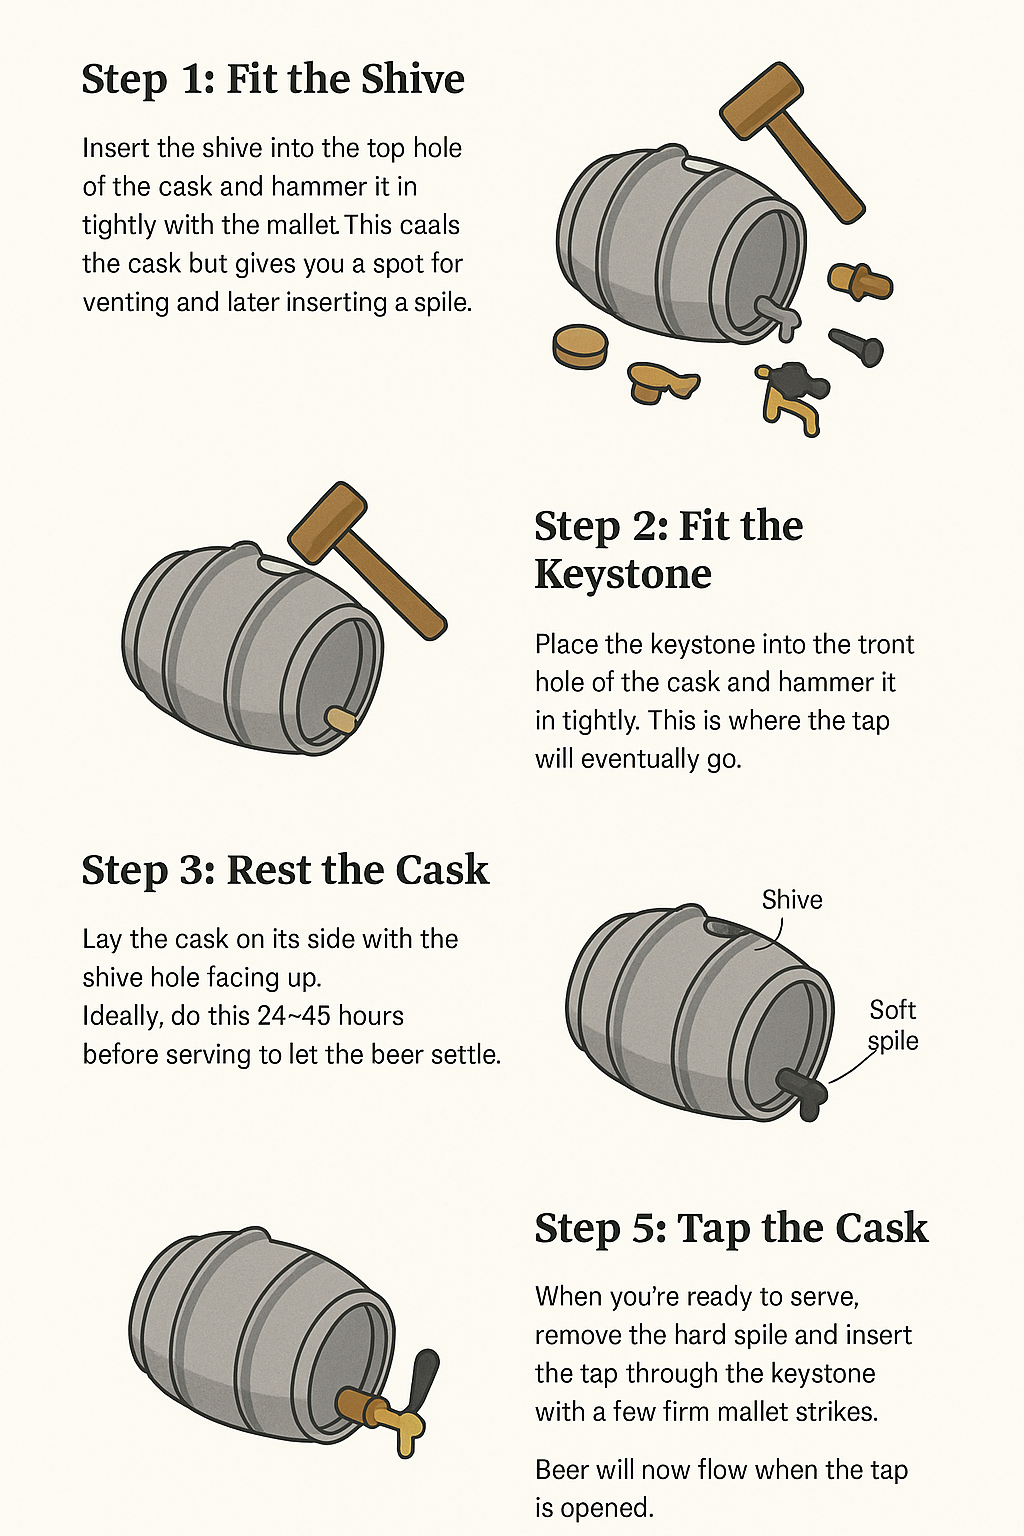
Step 1: Fit the Shive
Insert the shive into the top hole of the cask and hammer it in firmly with the mallet. This seals the cask but gives you a spot for venting and later inserting a spile.
Step 2: Fit the Keystone
Place the keystone into the front hole of the cask and hammer it in tightly. This is where the tap will eventually go.
Step 3: Rest the Cask
Lay the cask on its side with the shive hole facing up. Ideally, do this 24–48 hours before serving to let the beer settle.
Step 4: Vent the Cask
- Insert a soft spile into the shive to allow excess gas to escape.
- Listen for the hiss — once it quiets down, the beer is properly vented.
- Replace the soft spile with a hard spile to keep air from entering.
Step 5: Tap the Cask
- When you’re ready to serve, remove the hard spile and insert the tap through the keystone with a few firm mallet strikes.
- Beer will now flow when the tap is opened.
Step 6: Serving Tips
- Keep the cask cool (ideally around 50–55°F).
- Swap between hard and soft spiles as needed:
- Soft spile → lets CO₂ escape while serving.
- Hard spile → seals it when not pouring.
- Drink it within a few days for the freshest pint.
Final Thoughts
in Cask ale is a beautiful thing — natural carbonation, smooth mouthfeel, and traditional character. Prepping a pin cask the right way makes all the difference, so take your time with venting and tapping. Then enjoy sharing pints with friends, the way it was meant to be.